

Hummingbirds can be tricky subjects to photograph, as they are almost always on the move, but it is not so hard once you learn the techniques. I will focus on how I have learned to do it with a bridge camera, but most should apply to DSLR or mirrorless users as well.
I have broken this guide down between techniques (things you can learn to do to get the perfect hummingbird picture) and the camera settings and choices that will help you most.
Techniques
The three steps to being ready to take a hummingbird picture are know the hummingbirds, wait patiently, and choose your composition beforehand.
Know the hummingbirds
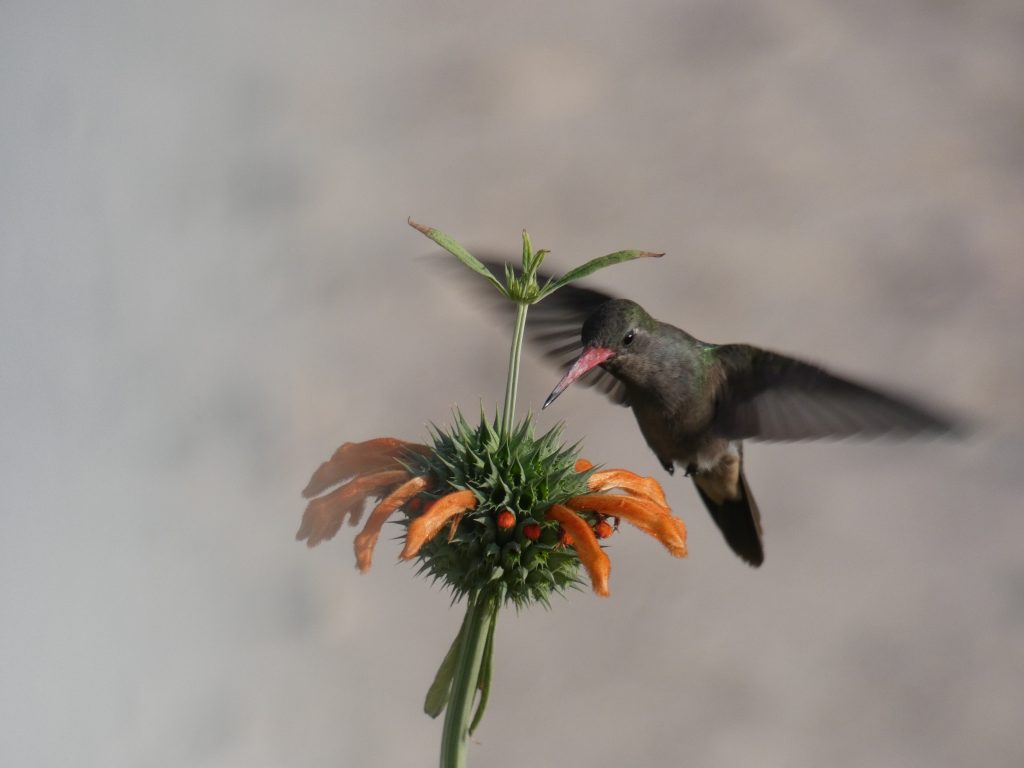
If you want to photograph a certain type of hummingbird, you will have a better chance of success if you understand its habits. For example, if you know that the Blue-tailed Emerald frequently visits the bottlebrush tree, you can wait by the tree, as I did for the photo below.

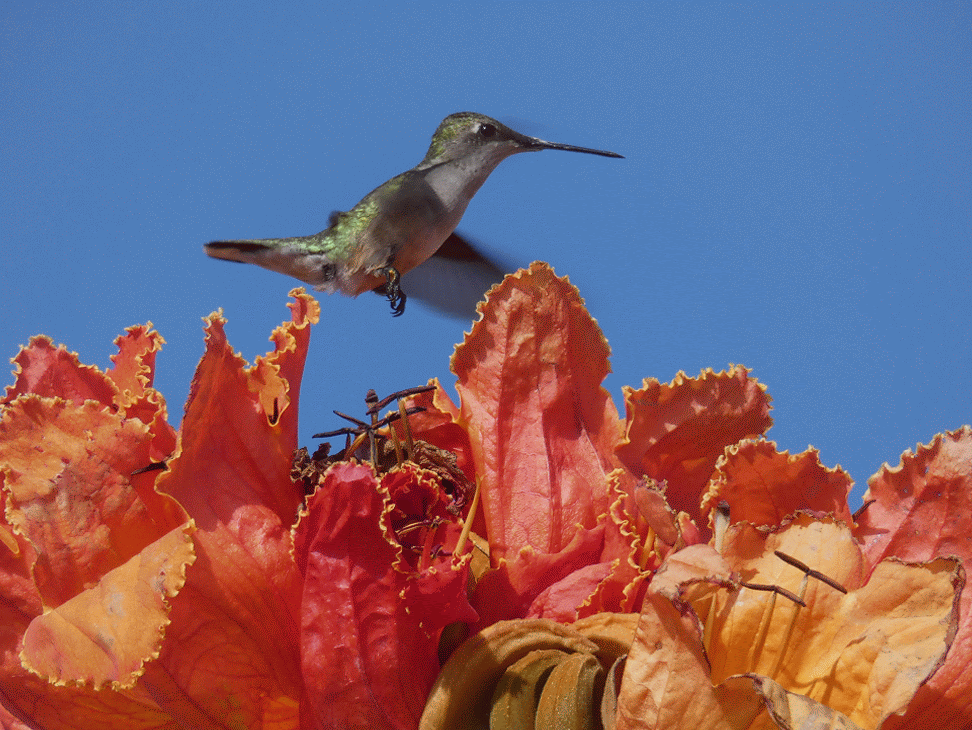
Another useful thing to know is the time of day when the hummingbird is most active, so you are not spending time waiting at the wrong time of day. This is less important for hummingbird photography compared to bird photography in general, since hummingbirds usually must eat every 15 minutes and thus are active throughout the day, but it still can be a time saver. Thirdly, if you know a hummingbird’s pattern (i.e. the order it visits a tree’s flowers, or its favorite branch to land on) it will be easier to track the bird and take its picture. For example, once I realized that a particular Sparkling Violetear kept landing on the same branch, I focused my camera on that branch, waited, and took the following picture as it landed.

If you want to photograph nearby hummingbirds, you can simply observe them to learn these characteristics about them, but if you plan on photographing hummingbirds while traveling, you may need to do some research to learn about the hummingbirds in the area.
Wait Patiently
It is hard to photograph any type of bird without being patient, and hummingbirds are no exception. I have found them to be less shy than many other birds, but they will still fly away if I move quickly or make noise. The hard part is deciding whether or not to keep waiting next to a tree or move to a different one that you see hummingbirds at. From my experience, if I know that hummingbirds do come to a particular tree, it is best waiting by it than “chasing” hummingbirds around from tree to tree. They may not come quickly if they are shy, but if you wait patiently, one might visit the tree, providing you with a perfect photographing opportunity. Either way, moving is more likely to scare them away, while waiting is more likely to bring them closer. Understand that sometimes a hummingbird picture takes a long time of waiting. I waited and watched for over an hour without results before this hummingbird showed up and let me photograph it.
Choose Your Composition
Composition is a common element of photography, but with the exciting moment of photographing fast moving hummingbirds, it can be easy to forget about. You can still use poorly composed images of hummingbirds for reference for artwork, but a careful composition also makes the picture worthwhile for printing, sharing, or publishing. It is better to get the hummingbird in the frame, ignoring composition, than to miss the shot altogether, but by choosing a composition beforehand, you will be prepared for stunning photography.
By choosing a composition beforehand, I mean: choose a flower (that you expect the hummingbird to fly to) that has good lighting and plan a composition before the hummingbird arrives. If you have a tripod, you could set it up with the composition, ready to press the shutter when the hummingbird visits your chosen flower.
The advantage of this approach (as opposed to merely trying to track the hummingbird and take its picture at any flower it visits), is that you can guarantee enough lighting for your chosen shutter speed, avoid being constantly one step behind the hummingbird’s movements, and end up with one great photo rather that many mediocre ones. This technique may seem boring, but it can yield excellent results. I used this method on the photo below.

Settings
Hummingbirds are very fast. To photograph them, you need to use settings that can keep up with them. First, I will explain the camera settings I use to do this, and second, I will add details as to choosing lighting for hummingbird photography. My focus with these settings and tips is with a bridge camera in mind, which is what I use; different camera types may work better with a different combination of settings (such as allowing a faster shutter speed or continuous autofocus).
Speed
These are the settings I use to take pictures of hummingbirds:
- Fastest mechanical shutter burst mode (10 fps)
- Quick shutter speed (1/1000 of a second)
- JPG output only
- A medium-large sized focal area in the center of the frame
- Not continuous autofocus.
Here is why I recommend using those settings:
Since a hummingbird’s wings flap 50+ times per second on average, you will want a very fast capture frame rate to maximize your chance of getting the hummingbird in a perfect position. You will end up with many pictures, but that is ok.
For every hummingbird picture that I have included in this article, several hundreds of others I deleted, leaving only the best. You do not have to worry about running out of film, so just take as many hummingbird pictures as possible and review them to find the best later. You can see a series of pictures that I took at 10 frames per second below. Having many options is not only good for finding the perfect one, but also you may find the others useful as references in creating a hummingbird drawing.
Slow shutter speeds will only result in blurry wings (which could be fine if you want that, but I prefer sharper wings for drawing reference). I try to use 1/800 or 1/1000 of a second to freeze the action. There is still some motion blur in my hummingbird pictures, but the feather details are still there. If you want to remove all motion blur, you will need to use shutter speeds such as 1/2000 or faster, which will likely take a camera with a larger sensor size or the use of external flashes in order to keep ISO low.
Raw has its benefits, but JPG is better for hummingbird photography. This is because JPGs take up less memory and will not fill your camera’s buffer as quickly as if you use Raw. It can be very frustrating to be taking a burst of pictures only to have the camera’s buffer fill just before the hummingbird is in the best position. JPGs allow you to take full resolution pictures and a longer burst than if you used Raw with half the resolution.
For most bird photography, I use the single area autofocus option so that I can easily choose the part of the picture that is in focus (otherwise, branches become popular focal objects). For hummingbirds, I using the same setting, but with a larger autofocus box than you would for stationary birds. This is because hummingbirds move around the frame quickly and you want them to be in focus faster than in the time it would take to move your camera and then recompose.

I do not use continuous autofocus for hummingbird photography, even though hummingbirds move around a lot. In this autofocus mode, I find that the frames per second drop to only 3-4, which is not enough for hummingbirds. Usually, the moment that you take a hummingbird’s picture, it will be hovering, in which case you do not need continuous autofocus anyway. If the bird ever moves, simply re-focus and continue taking pictures.
Lighting
Light is always important for photography; for the best hummingbird pictures, choose it carefully.
I take pictures of hummingbirds in natural lighting, but many photographers use a flash setup to provide enough light for very fast shutter speeds. If you choose to use natural light, you will need a lot of it. Before the sun fully rises, and after it has partially set, the amount of light available is not usually enough for the 1/1000 or faster shutter speeds necessary for hummingbird action shots. Hummingbirds are often active during such times of low light, but since I cannot take their pictures, I usually just watch them until the light is sufficient.
Unless you are going for a silhouette or backlit, try to position yourself with your back to the sun, so that the bird in your picture is covered in light. I only recommend silhouette pictures after the sun has set, when the sky behind the bird will not be over exposed.
There is a small window of time that is best for hummingbird photography (and for most other bird photography): that is, just after the sun has risen, or just before it sets. In this lighting, shadows are less harsh, the warm sunlight emphasizes the hummingbird’s wing colors, and there is sufficient light for a fast shutter speed. I find that after the sun has been risen for a while, there is too much heat distortion and harsh shadows for ideal hummingbird photography.
Sometimes, however, you must take their pictures when they are active, whether or not the lighting is perfect. Even without the best lighting, you may get a picture worth keeping, or at least one that can be used as a reference.
Hummingbirds are among my favorite birds to photograph as God’s creative handiwork is evident in their intricate feathers and fast-paced life-styles. Hopefully you find the techniques and settings presented in this article helpful for your own photography. Go out and try them today.
It is really a nice and helpful piece of information. I’m satisfied that you simply shared this useful info with us. Please stay us up to date like this. Thank you for sharing.