

This tutorial will teach you how to create a beginner friendly, loose, and creative bird painting with watercolor. This project is fun and the result is a nice piece of artwork.
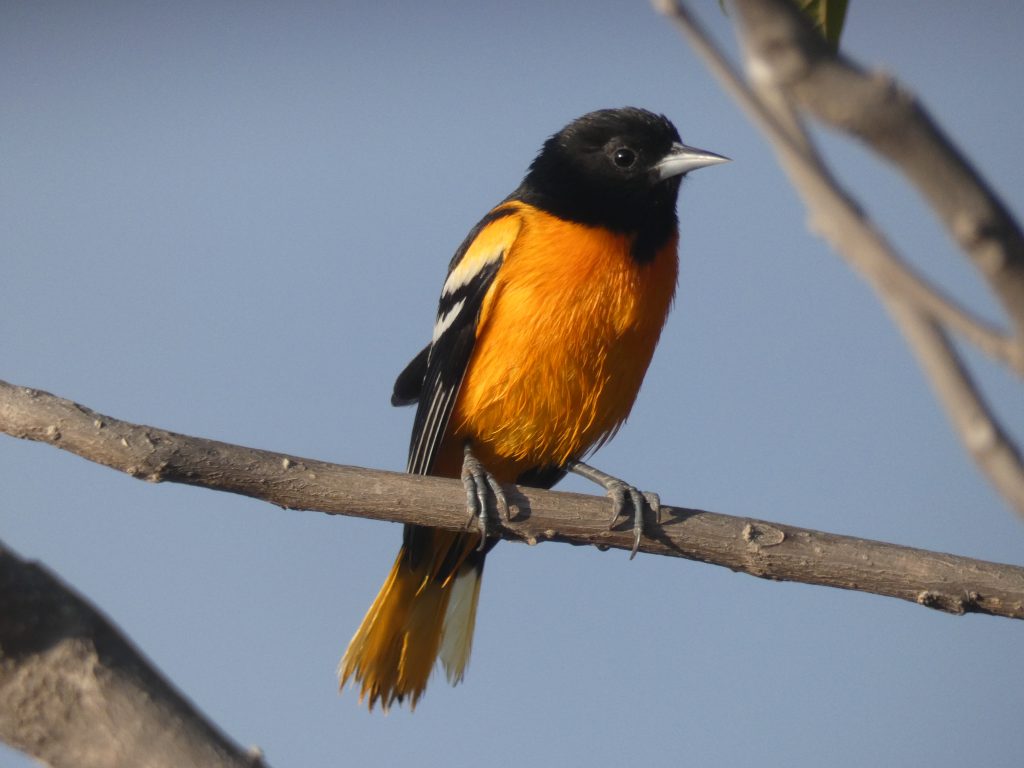
You can follow along and paint the Baltimore Oriole; or use the methods to paint a different bird of your choice.
Supplies Needed
- Watercolor paper (I am using Arches cold press)
- Masking/painter’s tape
- Graphite pencil (HB or H are best)
- Kneaded Eraser
- Paper towel
- Large pointed-round watercolor brush
- Small brush for details
- Watercolor paint
- (optional) white and black colored pencils
The supplies listed in bold are essentials; the others make the process easier. I find that colored pencils are helpful for the small details of the eye, but it is perfectly fine to use paint and a small brush instead.
Drawing the Bird
I like to start by drawing the bird with a graphite pencil. If you would rather paint without a drawing, you may skip this step, but by drawing first, it is easier to get the bird’s shape and features correct.
Only draw the essentials for reference while painting – I stick to including only the outline of the bird, beak, eye, wing, and possibly the branch. Remember, this is a painting, not a drawing, so only add enough of an outline to help you paint.
Draw very lightly! If you press hard, not only is it hard to erase, but you may create indentations in the paper that will attract the paint and form a harsh outline to your painting.
When you are finished drawing, softly press on the lines you made with a kneaded eraser to remove some of the graphite and make them even lighter. Watercolor is a very transparent painting medium, so lines easily show through. I try to erase enough so that I can just barely see the lines.

Painting the First Layer
I recommend preparing the paper by getting both sides wet and taping it to a drawing board, placemat, or other surface, and letting it partially dry before painting the first layer.
While the paper is still a little wet (you can paint water on if it is already dry) mix a watery, bright yellow and paint it over the belly and tail of the Oriole. I used Hansa Yellow Light for this. I suggest leaving a few streaks and spots without paint, as shown in the picture.

Before the yellow dries, mix a warmer yellow (I used New Gamboge) and drop it in around the belly, mixing it with the previous yellow except for in the areas of brightest light. Make sure that this new paint mixture has a little less water than the previous yellow to prevent blooming. Add extra of this on the right side of the bird, where the shadow is.
While the paint is still wet, add a touch of red (Pyrrol Scarlett) to the warm yellow and paint in orange, letting it mix and blend with the other paint. Using a small brush (or the tip of a pointed-round brush) pull some of the paint out to form feathers.

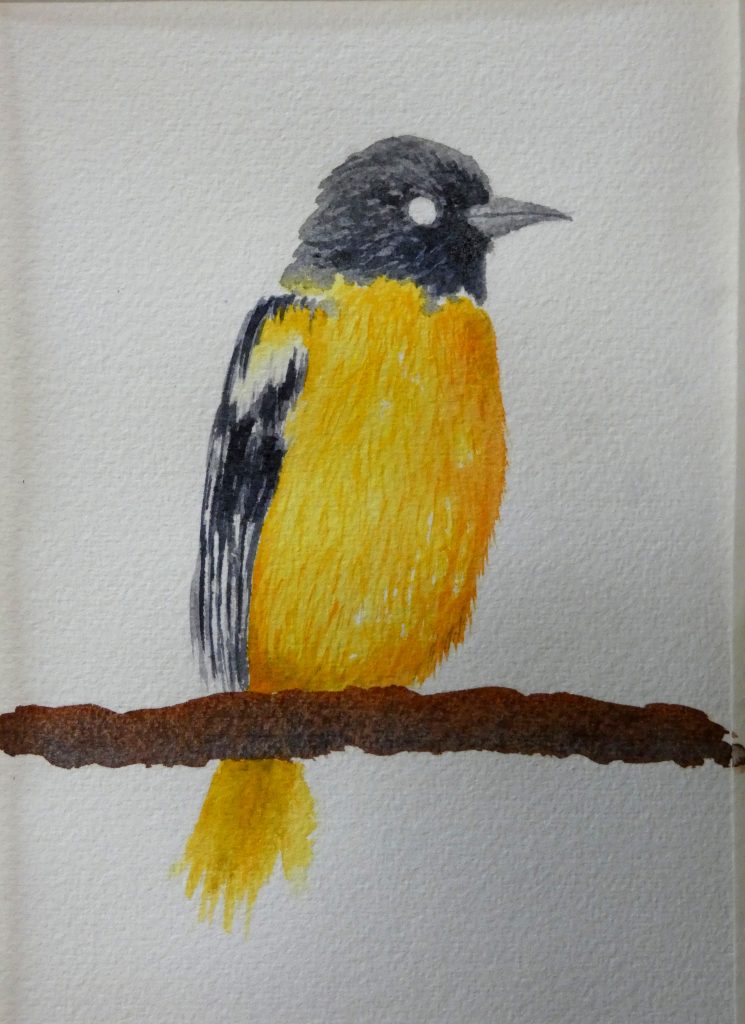
Once you are satisfied with the first layer on the belly, you can begin working on other parts of the bird while it dries. I did the beak, wing, and head next.
There is a lot of black on this bird, but we will not use black paint, rather we will mix our own grey and layer it to make it dark. I combined Burnt Siena with French Ultramarine to create a cool grey that I used for the first layer of the beak, wing, and head.
Paint the beak with a bit of grey mixed with water, so that it is light in value. Then, move on to the wings, painting with a slightly darker version of the grey. With the tip of your brush, draw lines of medium grey and leave gaps between them to form the wing pattern. Leave the colorful area of the wing without paint; we will address that part on layer 2.
Next, paint the entire head with medium grey, being careful to paint around the eye. While this paint is still wet, drop in dark grey on the lower right side of the head, letting it blend and create a gradual shadow transition. Don’t worry if it is not dark enough yet; it will get darker on the second layer.

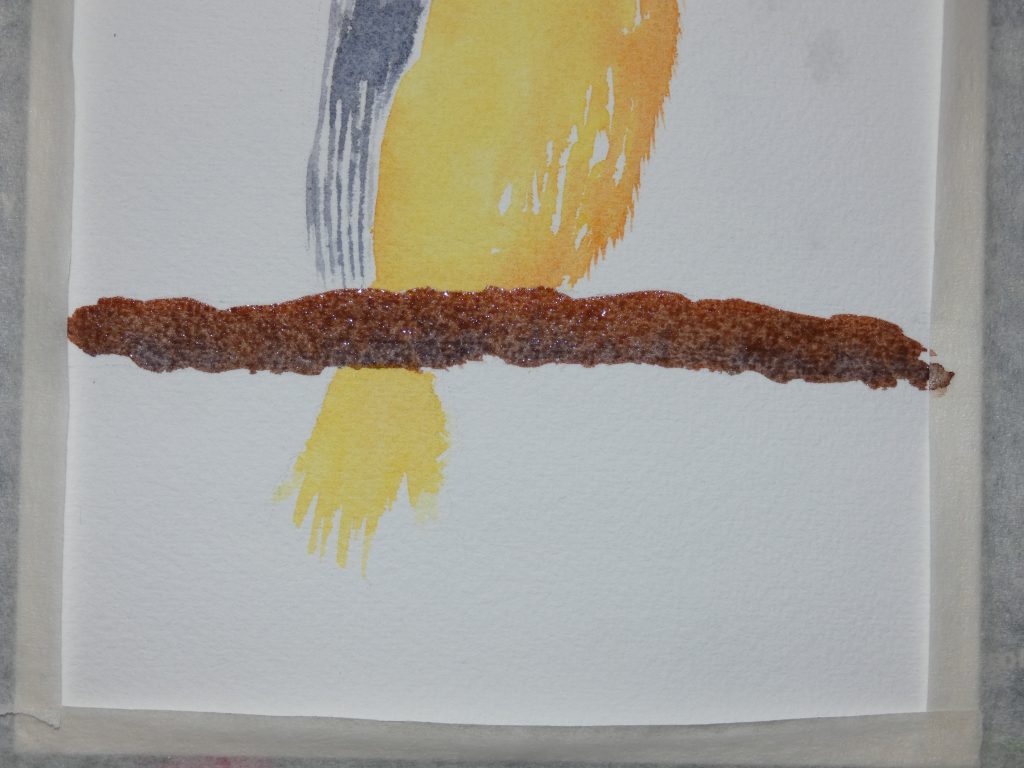
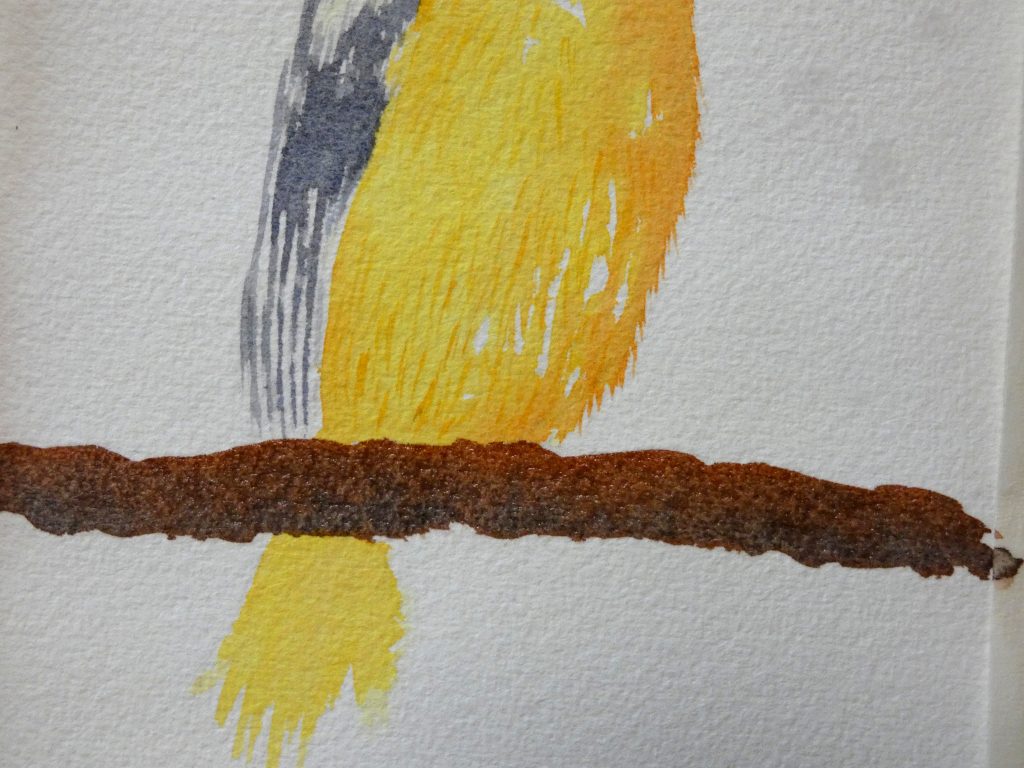
To finish the first layer, we will paint the branch. Make sure that the feathers on either side of the branch are completely dry before proceeding.
You can choose whatever brown you would like for the branch; I used Burnt Siena with a little bit of French Ultramarine to make a dark brown. Paint this over the entire branch. While the brown is still wet, drop in dark grey on the bottom of the branch, and spread it to create a subtle shadow.
Second Layer
With a darker version of warm yellow/orange and a small brush (as small as possible), start adding feathery strokes to the belly. Add as many as you like. You can use these feathers to overlap the areas that you previously left white.
You can also use the same paint to darken the right side and lower area for shadow. I also used a small amount of grey mixed with orange for a few dark feathers and to create the darkest shadow regions on the belly and tail.
Then, using light yellow, add the colorful feathers on the wing. While the yellow is still slightly wet, go over the upper part with some orange, letting it blend in.

Next, with a darker version of the grey that you used earlier, add the mid-line on the beak. Also use it on the bottom and top edges of the beak and with a clean, damp brush, spread and blend the paint to form a soft shadow.
Add dark grey (almost black) feathers to the head, making sure to use directional strokes that correspond with how the actual feathers point. Similarly, add feathers to the wing, and darken the stripes on the lower wing. Keep adding feathers and darkening areas until it is as dark as you want.
With your same dark grey, paint feet for the bird. When the first foot layer is dry, add another to just the shadows on the right and lower edges.
This finishes the bird – almost – the eye will be done last.

Background
Feel free to make the background in a fun and creative way. I chose to use blue (Phthalo Blue Green-Shade) since it is the complement of orange and makes the Oriole stand out vibrantly. Green could also look nice for this painting. You can also mix colors in the background, but I chose to stick to shades of blue.
Start by first painting clear water in patches around the bird (this helps keep that paint within the water and avoid creeping over the bird). Then, add touches of vibrant paint, spreading it with a large brush. Leave patches of white. Use multiple layers to make the color more vibrant, and use a brush with just water in it to spread the paint as you like.
Have fun with the background. Add splatters of color if you want. Soak up paint – creating a cloud-like effect – with a paper towel. Bring the paint right up to the subject in places using a small brush. Remember that with watercolor, sometimes mistakes become features.

The Eye
You can create the eye either with a very fine tipped brush or with sharpened colored pencils. I recommend practicing several times on a separate piece of paper first, since the eye is very important in a painting and can make it look much better or much worse.
First paint an outline to the region you want to be left white (the catchlight). Then, avoiding that region, paint a black (I used my same grey mixture, just with less water) circle for the eye ball, leaving a ring around the eye (which will be painted light grey later). Fill it in and add another layer to make it darker if necessary.

When this is dry, use a light grey to paint the ring around the eye. This finishes your painting of a Baltimore Oriole in watercolors. I hope you had fun painting it!

INCREDIBLE!
Gracias Amy!
May I just say what a relief to find someone that actually understands
what they are talking about on the web. You actually know how to bring an issue
to light and make it important. More people ought to look at this and understand
this side of your story. It’s surprising you are not more popular given that you surely possess the gift.