In this second tutorial of the Watercolor Waterbirds series, I explain the steps and techniques used to paint a Green Heron with watercolor paints. This time, we’ll consider using negative painting and soft edge painting to depict the details of such an intricate bird.
If you have not done so already, I suggest checking out the first tutorial of the series, How to Paint a Duck with Watercolors, as we’ll use some of the same techniques, and build on the procedures used in that tutorial. We’ll also be relying on the edge-softening technique for building shadows and color complexity, so if you are unfamiliar with it, go ahead and try it out for practice before continuing with this painting.
I suggest similar supplies as with the duck painting, except that we’ll be using Burnt Sienna, Burnt Umber, French Ultramarine (warm blue), New Gamboge (warm yellow), and Azo Yellow (middle/cool yellow) for this painting. Due to the small wing details, a larger paper and smaller brushes are preferable.
When selecting a reference photo of a Green Heron, I found this one which captures the character of the careful, watchful heron, but in it, the tail is out of view…
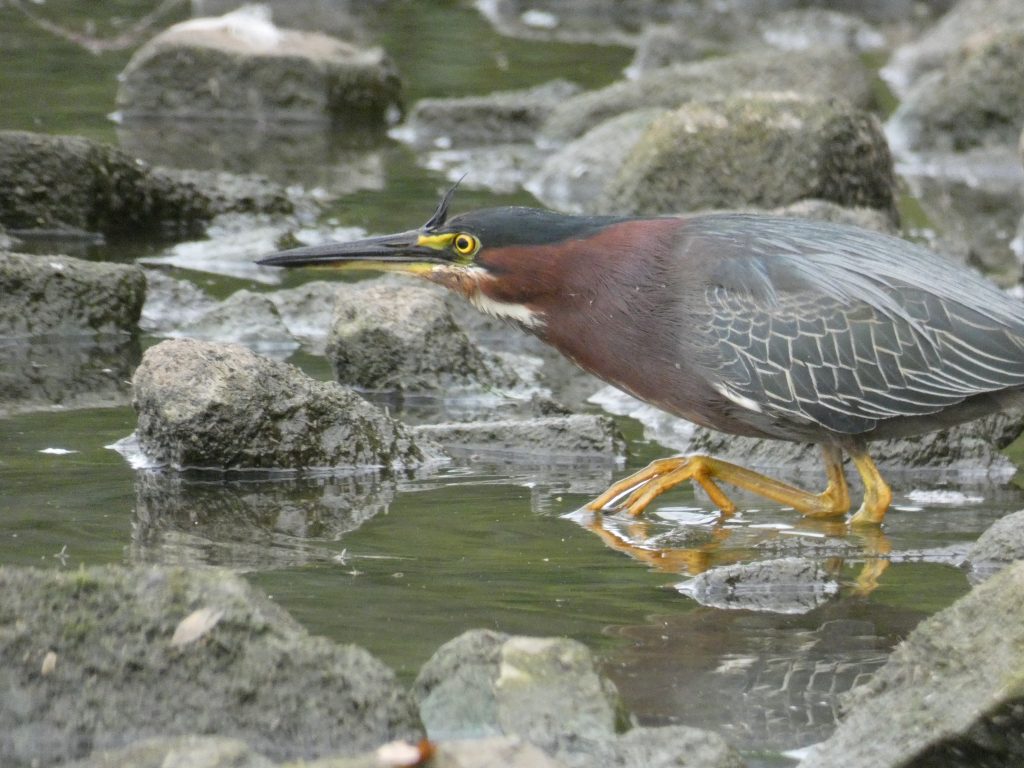
So we can also refer to this picture to know how to paint the tail.

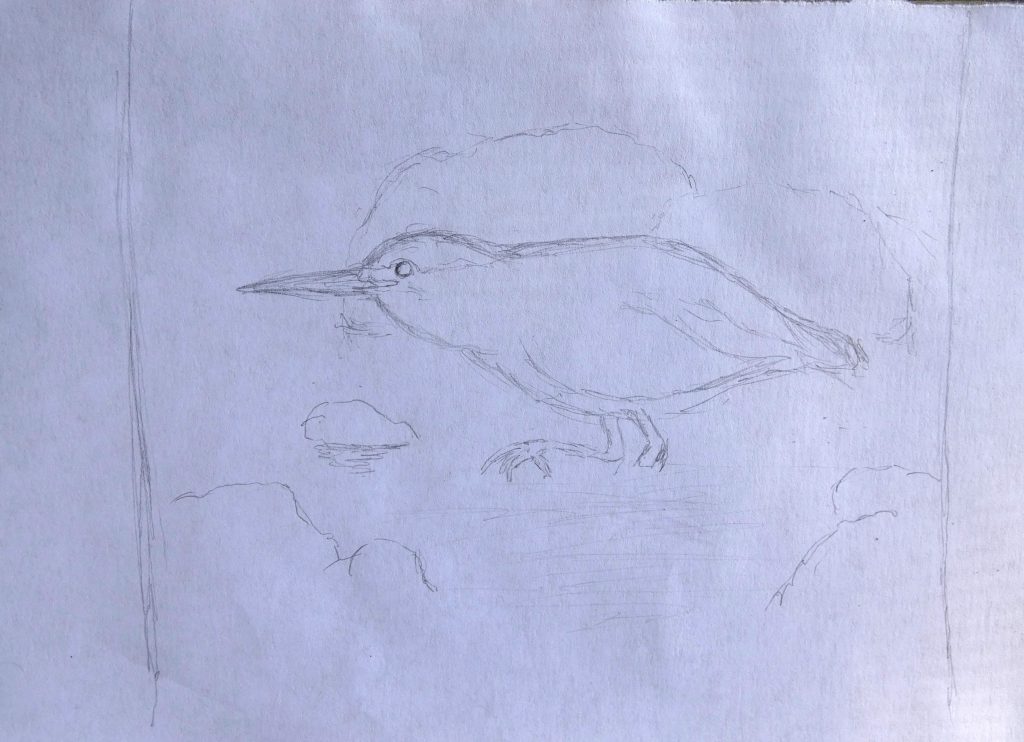
It is usually a good idea to do a practice sketch before diving into the painting, in order to get a better feel for the shapes of the subject and to plan composition; I did one, and suggest you do too.
Composition tip: a rule of thumb for composing bird photography/artwork is to give the bird twice as much space in front of its beak as behind its tail. This gives the bird room to fly (or, in this case, dive) in the viewer’s mind.
(Note that while I planned to add rocks around the heron in the background, when it came to painting the background, I changed my mind and went with an easier background to paint nicely, but if you want to add rocks, that’s totally fine, and it may better describe the situation that the heron is in).
Base Layer
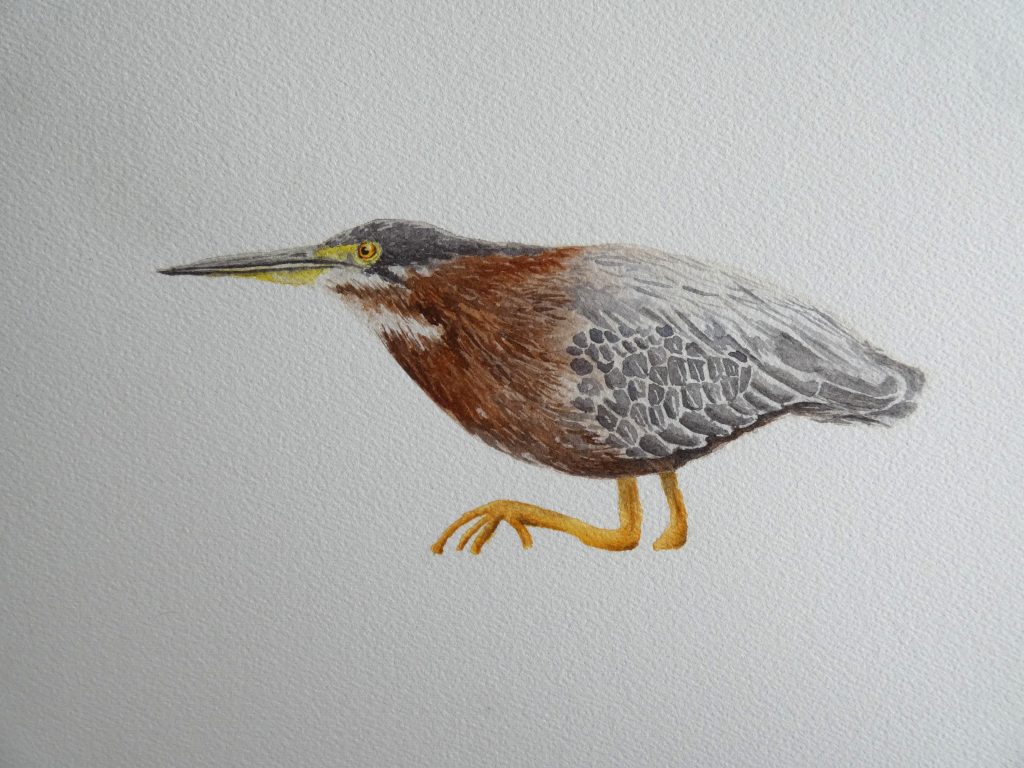
As with when we painted the duck, we’ll start with a base layer to map out colors and values; this will make the heron painting more realistic.
After applying a water glaze (simply painting with clean water, which will allow a smooth application of paint over the area), we can paint in greys and browns around the body. With watercolor, you can make things darker, but not lighter, so for each area, we use a base that will be the lightest color in that area at the end; in some places, you may want to lift some of the paint with a paper towel to preserve white highlights, as shown in this image.

We’ll then add a yellow base in the places that it is needed; again, starting with a water glaze, then painting on the wet paper. To accurately represent the colors of the bird, we’ll use warm yellow (New Gamboge) for the feet and regular/cool yellow (I used Azo Yellow, but Lemon Yellow also works) for the lower part of the beak and near the eye.
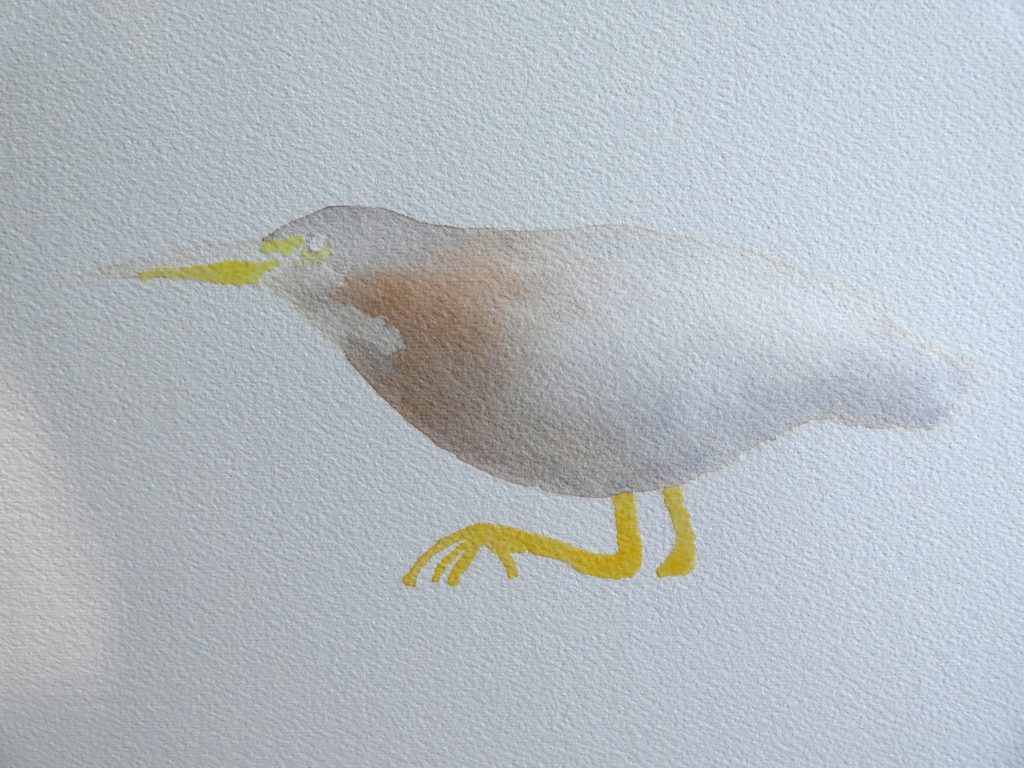
After the yellow on the beak dries, we can add a light grey base layer to the rest of the beak.
The Eye
While I sometimes paint the eye last, it can be a better practice to paint it first. Since it is usually the focal point, it can either make or break the painting, and if a mistake is made while painting the eye, it is much easier to start over during the beginning of the painting rather than at the end.
Procedure tip: For detailed paintings (and drawings), I recommend starting with the eye and continuing to work outward from it.
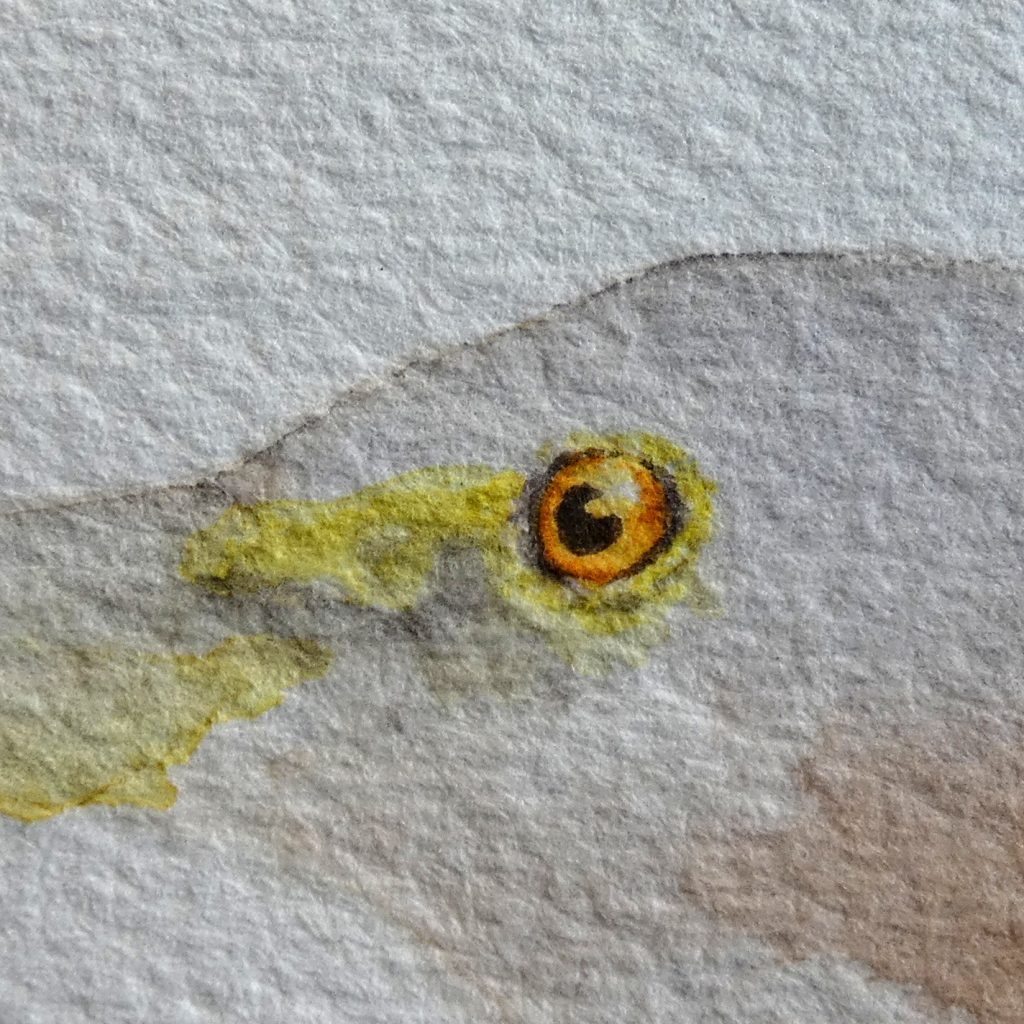
We’ll begin the eye with a coat of yellow, making sure to preserve the white catchlight.

After it has dried slightly (but is still damp), we can drop in a bit of warm yellow around the edges. Notice how the eye contains the lightest and brightest yellow near the middle, where it bulges, while the color becomes warmer and darker near the edges.

Once the eye is completely dry, we can darken the edges with a mixture of New Gamboge and Burnt Sienna (softening the edges inward), and add a pupil with dark grey (Burnt Sienna and French Ultramarine).

We’ll then add a dark grey edging around the eye and paint on some more yellow.

And we’ll finish the eye region with a few grey shadows.
The Beak
Working our way outward from the eye, we proceed with the beak next.
With dark grey, a thin-tipped brush, and the edge-softening technique, we can define the features of the beak. Simply paint on a particular edge/groove of the beak, and use a damp brush to soften the paint outward to make a gradual transition.
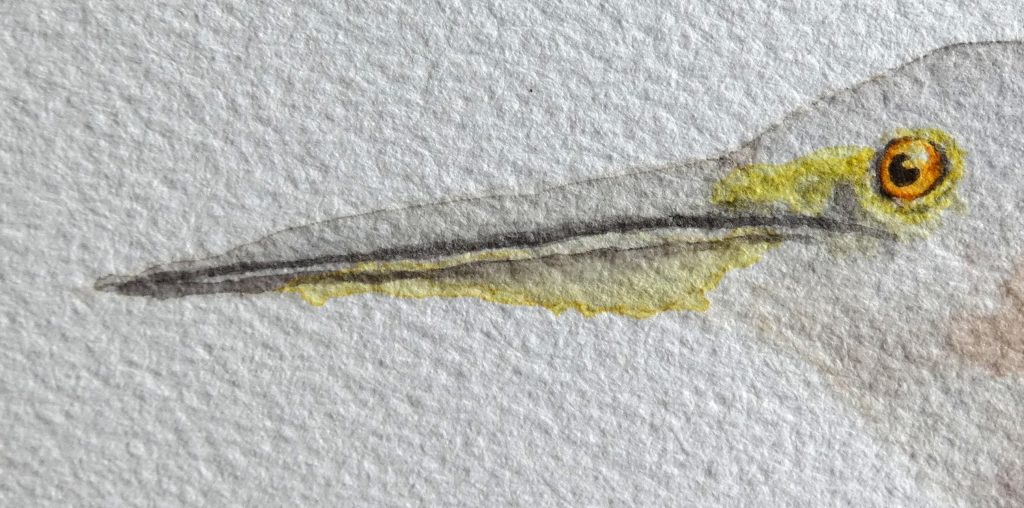
We can do this with yellow and different shades of grey, giving the beak volume and complexity through several layers.

The Neck and Body
Next, we’ll paint the neck. Since the base layer was quite light and unsaturated, we’ll paint another layer before adding the details. To ensure smooth transitions, I suggest covering the body in a water glaze and painting with color when the paper is damp. Even though we are not yet painting the wing, it is a good idea to cover it in water too, since the upper and leftmost parts of the wing are not very distinct from the rest of the body. It is important, however, to keep the area of white feathers dry, to prevent paint from spreading into them.
By using strokes in the direction of the feathers, we can leave a few highlight gaps in this layer.
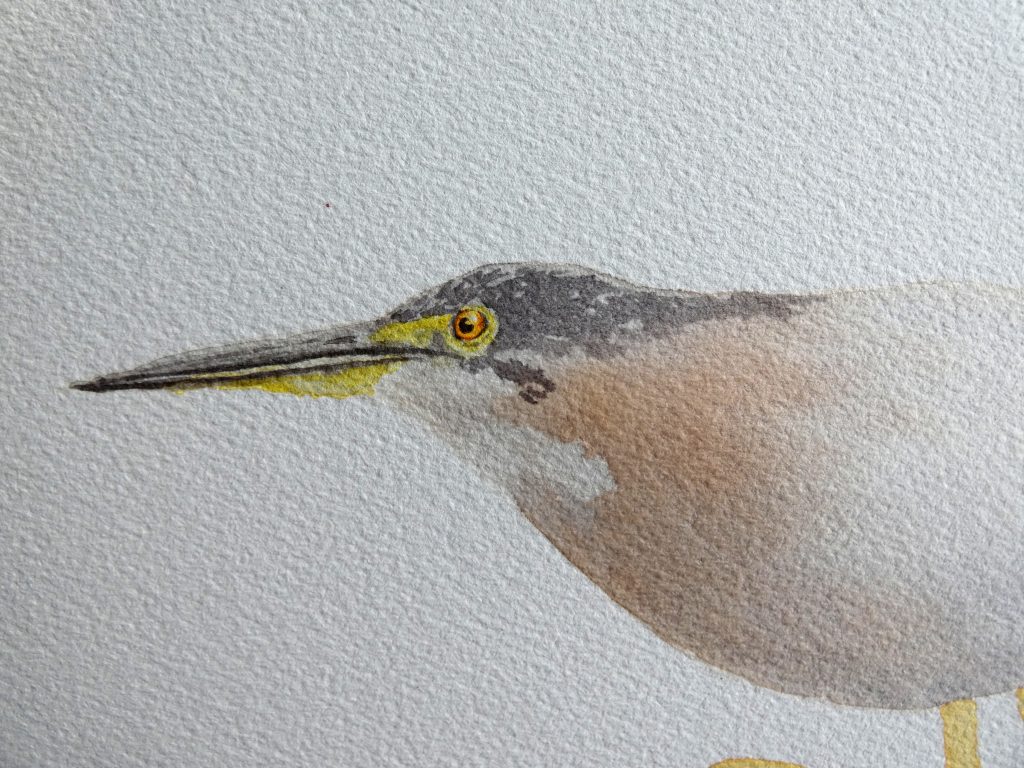
We keep painting down the body, using primarily Burnt Umber, but adding Burnt Sienna for the reddish areas and French Ultramarine for the shadowed areas.
We can use a clean, damp brush to pull a few strokes of paint into the wing and white feather regions, and keep the edges soft.
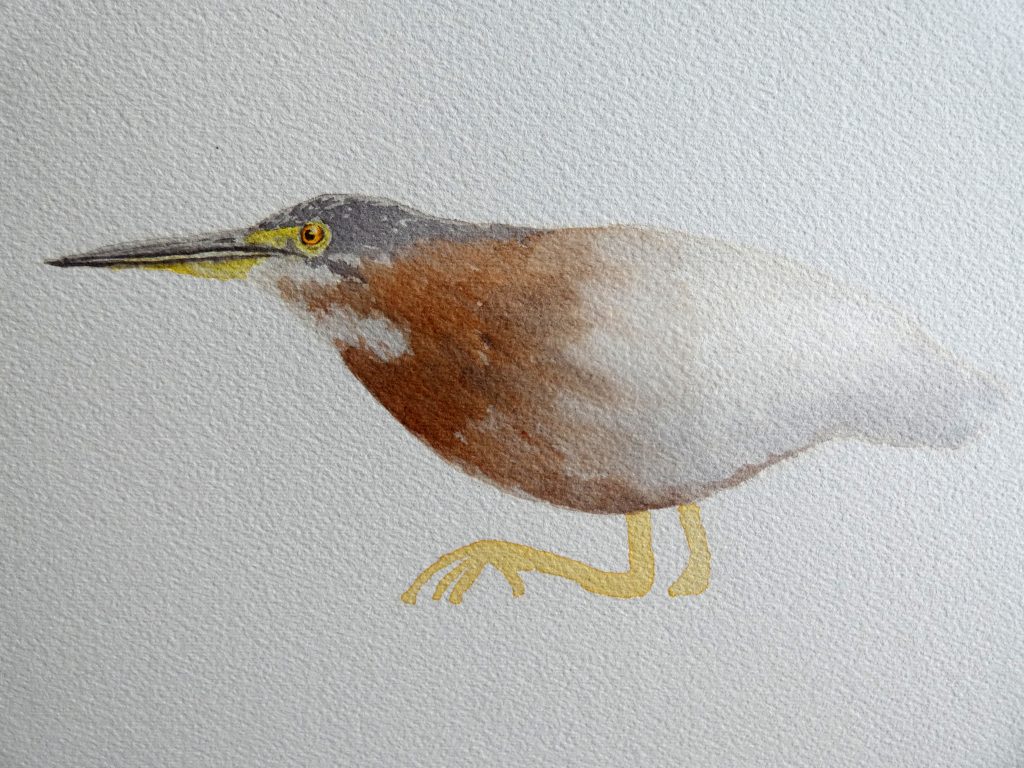
Side task: a second layer on the feet
We need that to dry before we can add feather details, so while we wait, why not add a second coat to the feet, deepening their color as well?
With a water glaze, a wash of New Gamboge, and some drops of Burnt Sienna in the shadows, the feet can be left to dry as we continue with the body.

Using similar feather-like strokes as before, we’ll paint the feathers of the head; this time, however, we won’t use a water glaze. By using lighter shades of grey near the top of the head and darker shades below, we can convey lighting and the form of the head.
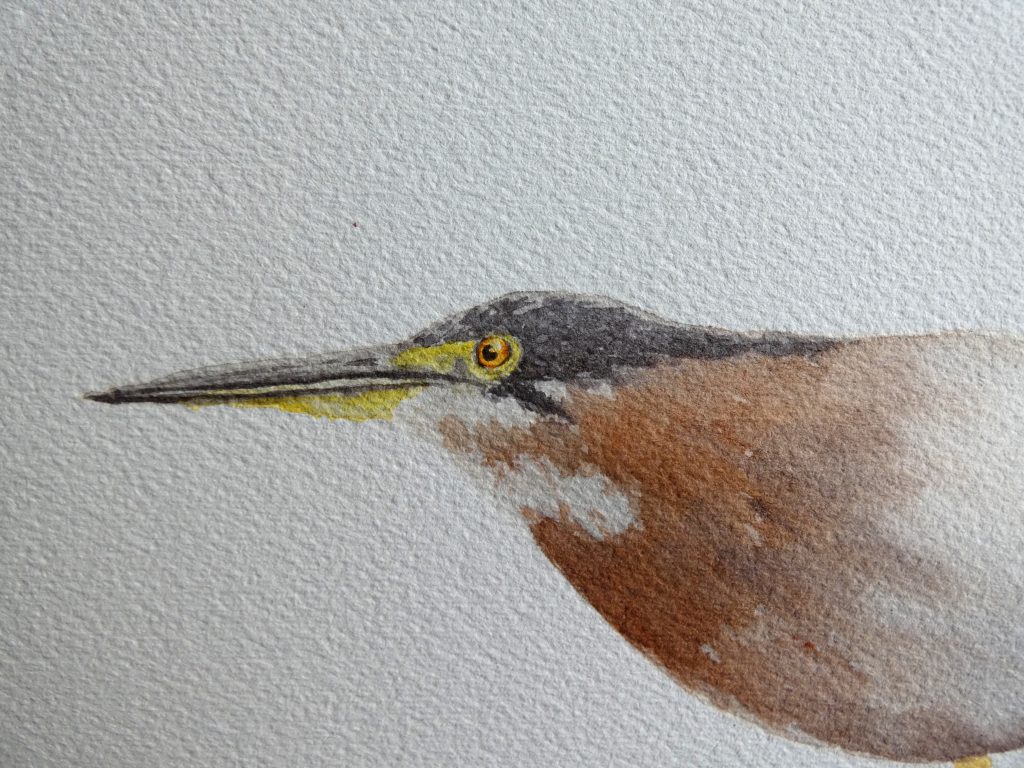
We continue along the body with the corresponding colors, making sure to paint in the direction that the feathers point, and using a fairly small brush, since the neck feathers are thin.

Now, onto the back. We’ll paint this texture using a pointed-round brush loaded with a light grey paint mixture. This enables us to paint with strokes that are wider in the middle and thin out on either end.
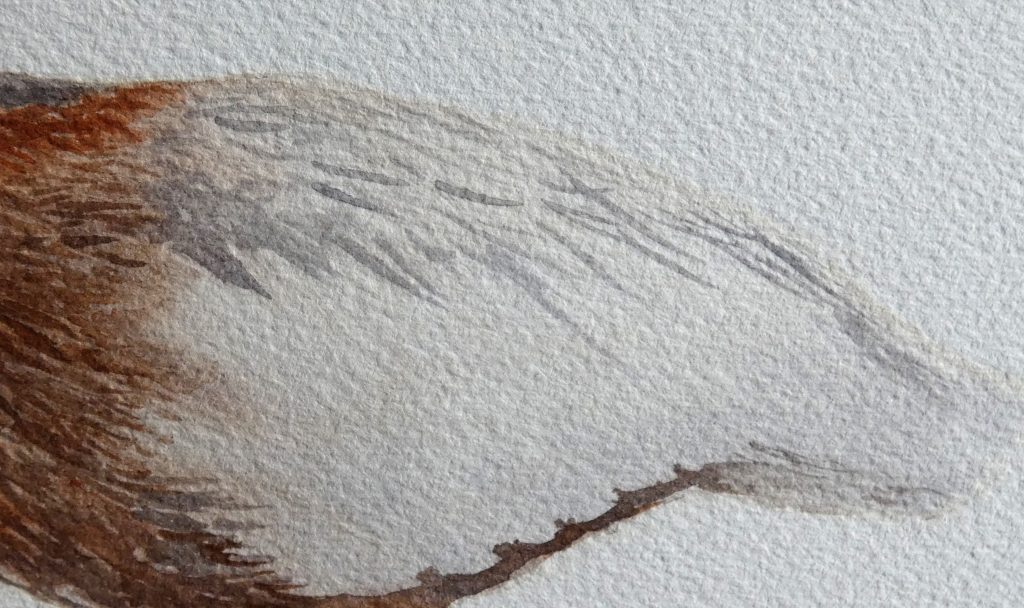
Wing Feathers and Negative Painting
To paint the detailed wing feathers, we’ll use a method known as negative painting – painting the dark areas to leave the white design (rather than painting the white design directly). If you have masking fluid and would rather use it to positively paint the white design, you may, and will find it easier; otherwise, let’s focus on the dark shapes.
We’ll paint with grey along the outside of the long light-grey feathers of the back, as well as within the small feathers of the wing.

Don’t worry about painting each feather from the reference photo, but instead look for patterns and generate feathers from them (for instance, note that the feathers are smaller at the top and get longer, and the feathers are staggered such that the tip of one feather ends in the edge of two feathers).
This can be slightly tricky, but by looking at the dark shapes and painting them, we can convey the wing/tail feathers and design.
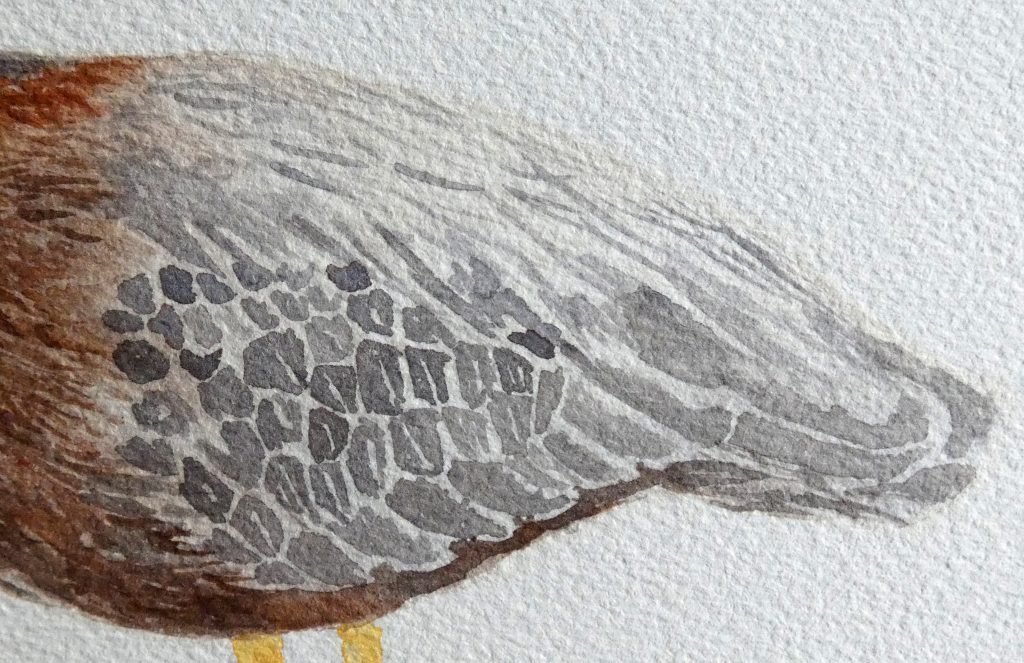
We can enhance the feathers with the edge-softening technique, adding a bit of a shadow on the lower edge, thus giving them a more rounded look.
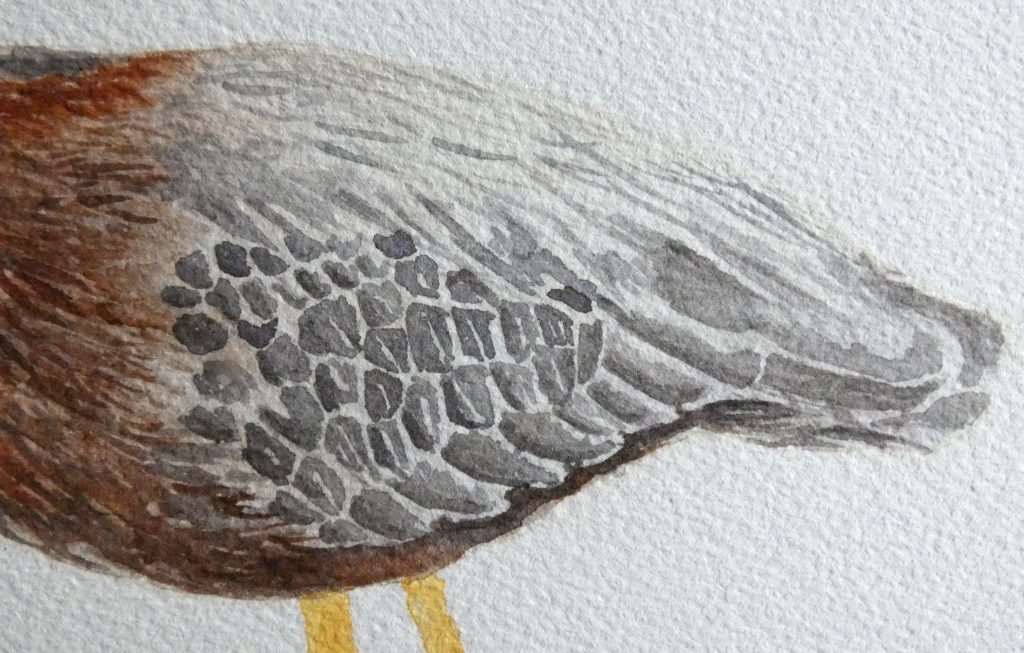
The Feet
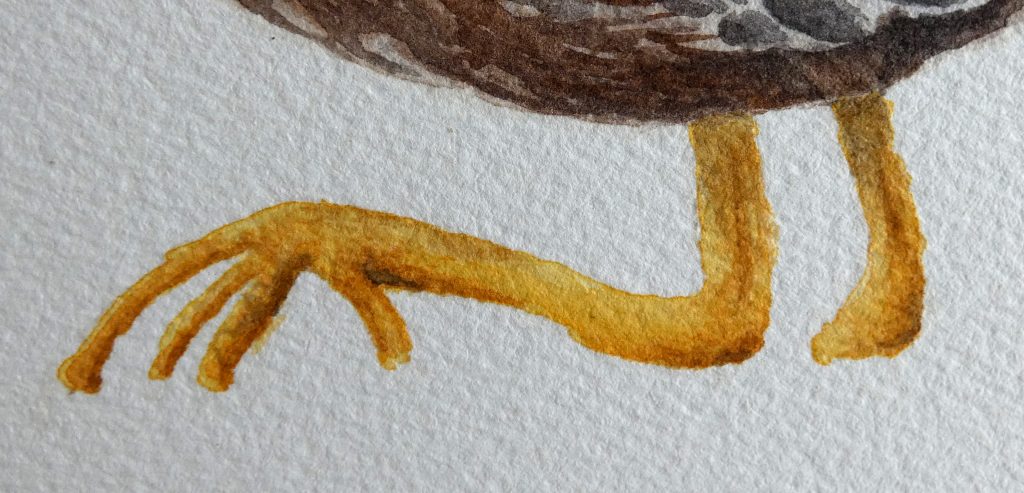
We’ll finish the feet with a series of edge-softened layers with progressively darker colors in the shadow areas.
First, with New Gamboge and Burnt Sienna.

Then with more Burnt Sienna.

Then with a darker color, using French Ultramarine in the mix. We can use this dark color below the wing as well, to deepen the shadow and give form to the leg on the viewer’s side (so that the foot is not disconnected!).
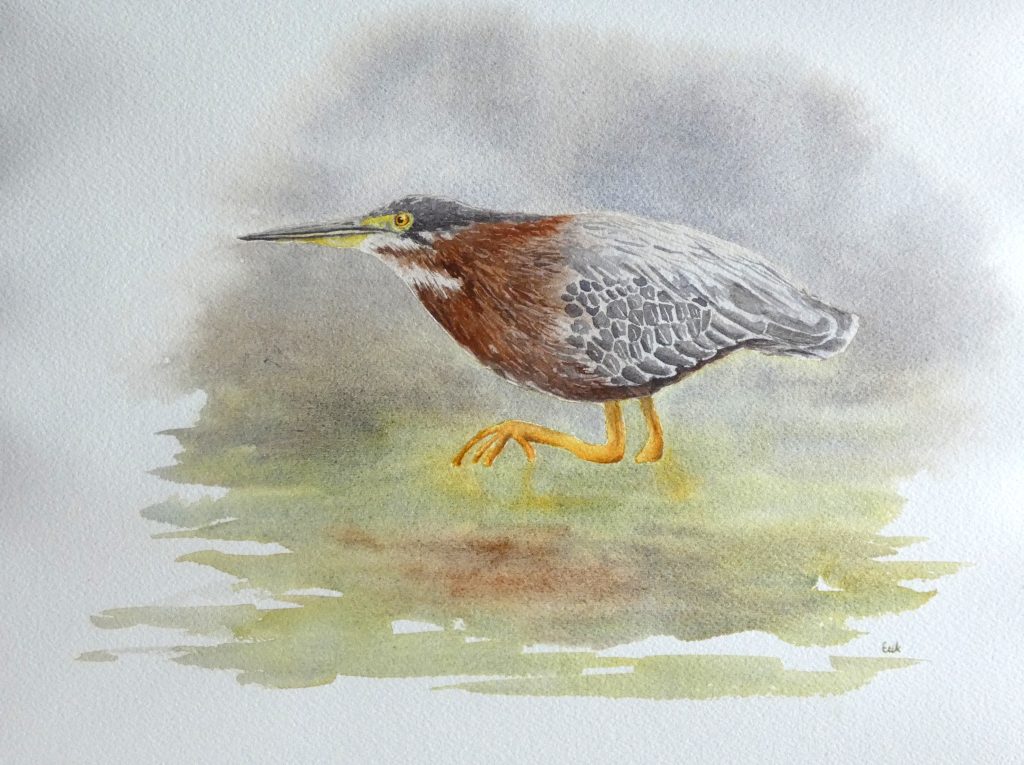
Now, the heron is completely painted and we can finish with a background.
The Background
To make the background out of focus and with soft color transitions, we’ll need to work on damp paper and act fast, so it is a good idea to mix all the colors you will need before beginning with it. We’ll use similar colors as with the heron, since we want to add a bit of a reflection in the water, but we’ll also use a lot of grey for the rocks and a murky green (New Gamboge and French Ultramarine) for the water.
We’ll carefully paint the entire background with water, using appropriate brush sizes to cover up against the heron. Then we’ll paint from top to bottom, so that the top (which is farther away) will be wetter when we paint on it (and thus more diffused), while the bottom (which is closer) will have a little more time to dry, yielding slightly sharper edges.

By quickly adding paint onto the damp paper, we allow the colors to blend, while keeping some of the strokes visible.
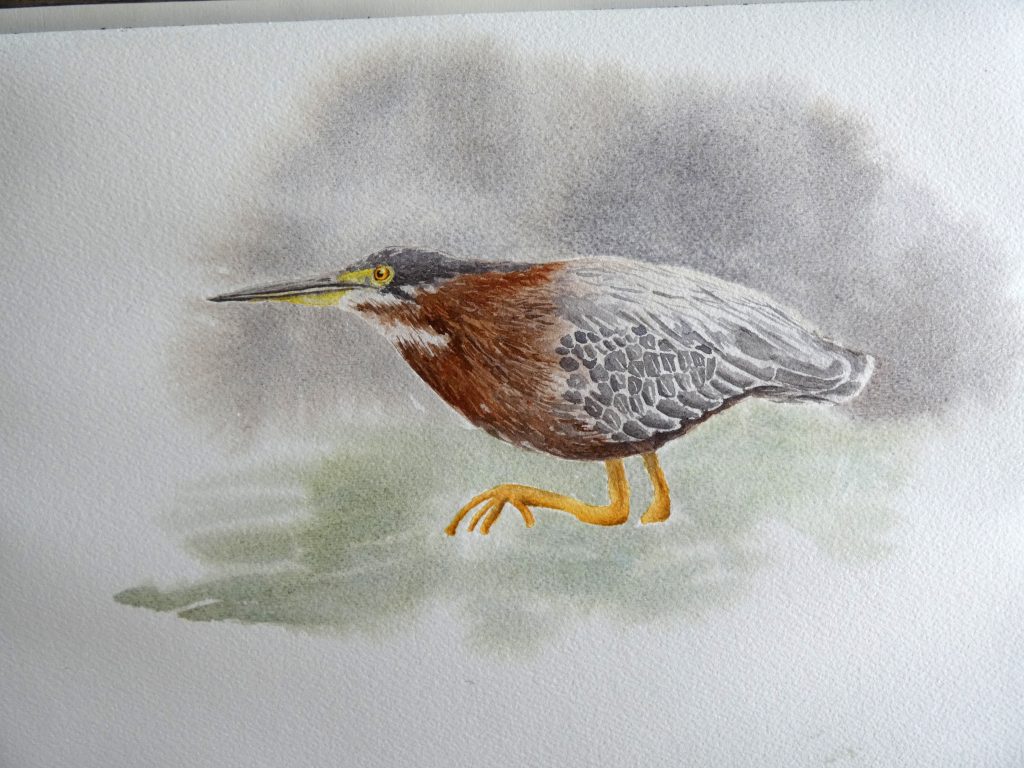
We can drop the heron’s reflection into the green water and smooth the paint with a clean, damp brush. Then, as the lower white portion of the paper is starting to dry, we’ll pull out a few strokes in the direction of the water ripples, adding a loose watercolor touch to the painting.
That completes the Green Heron painting with watercolors. Check back in a few days for the final tutorial in the Watercolor Waterbirds series, which should be coming soon.


yikes Erik, this one looks tricky, but I’m gonna give it a try on Monday:) Yours looks so real!
I just added this webpage to my feed reader, great stuff. Cannot get enough!
I really like your blog.. very nice colors & theme.
Did you design this website yourself or did you hire someone to do it for you?
Plz respond as I’m lokoking to create my own blog and would
like to know where u got this from. many thanks
Hello,
sorry for the delayed response; it has been a little while since I checked the comments here. I use WordPress, with the estar theme for the website design. I did not need to hire anyone for this, and it did not take any knowledge of html or css. Let me know if you have any questions with setting up your own blog.