

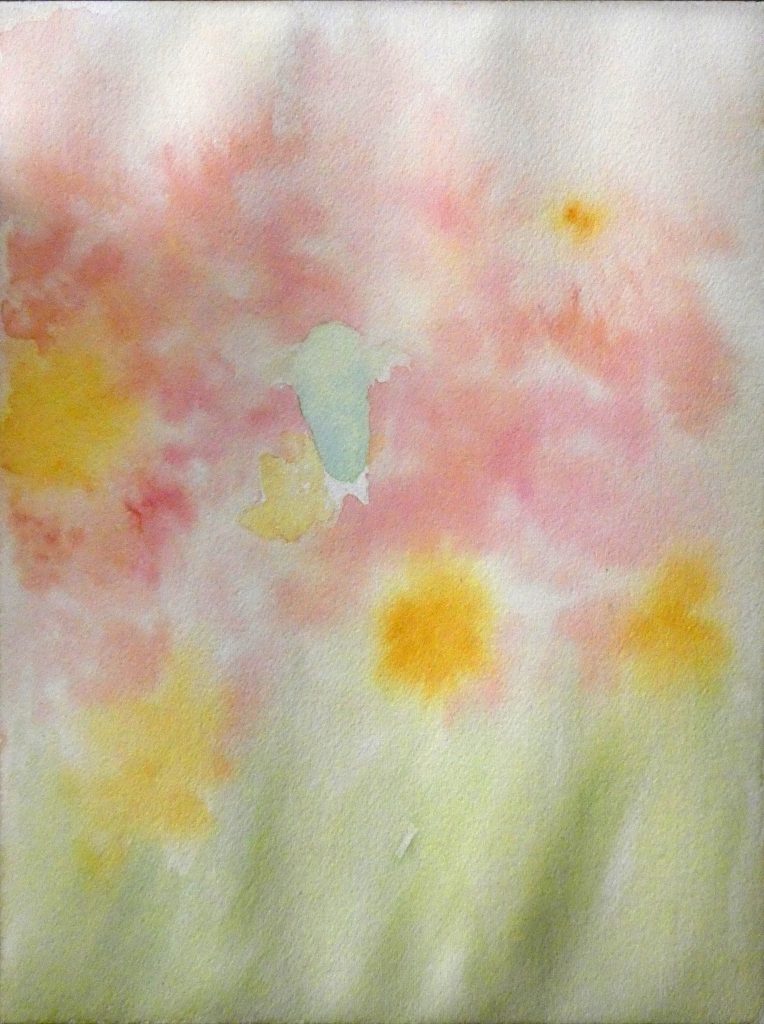
The other day, I was taking pictures of hummingbirds feeding in a field of colorful wildflowers; when I took the picture below, I immediately knew that the scene would be great for a watercolor painting.
The process of painting the hummingbird will be similar to the fun and easy hummingbird painting from before, but this time, we’ll add a colorful background and focus on depicting the detailed wing feathers. Besides the wings, we’ll leave details to a minimum, so this project should take less than two hours to complete.
We’ll use a fairly wet background layer, so make sure to tape down your paper, or use a watercolor block (as I prefer). I am using cold press paper for the texture, but hot press will work too.
Here is the reference photo we’ll use. I left it uncropped so you can have a better idea of the overall scene, but we’ll draw and paint with a narrower field of view.

Choosing Colors
As usual, we will try to stick to a limited palette, choosing only a few colors of paint so that our color mixtures are in harmony. We’ll need a warm yellow for the flowers, a cool yellow for the hummingbird’s emerald green, a cool red for the pinks in the background, a cool blue for the vibrant greens, and (optionally) a natural blue for the grass green. The particular Daniel Smith colors I’ll be using are Quinacridone Gold, Azo Yellow (from M. Graham), Quinacridone Rose, Phthalo Blue (Green Shade), and Mayan Blue Genuine.
Painting the Background

We’ll mix an orangish pink using the warm yellow and cool blue, a muted green with the warm yellow and blue, and use unmixed warm yellow for the base of the flowers. Using the same warm yellow throughout the background leads to color harmony and an overall warm result.
Color Tip: Using the same primary color throughout a painting helps to unify the colors, and can be especially important when there are many colors in the painting.
After covering the paper with water (the surface can be damp to soaked, but should not have puddles of water anywhere; if it does, simply remove them with a paper towel), we can start painting the background. If we load a brush with paint and gently touch the surface where we want it to be, it will spread out due to the water, producing an out-of-focus effect.
We’ll add another layer to the background when it dries, so this first layer can be lighter than how you want the final to look. While we wait, we get paint the base layer of the hummingbird.
Hummingbird Base Layer

We will also begin with a water glaze on the hummingbird, meaning we should wait until the background is mostly dry, otherwise the paint will spread into the background.
On the base layer, we’ll use the brighter, more vibrant greens (mixed with cool yellow and cool blue), since it is easier to add the darker ones later. Then, while paint is still wet, we’ll touch in a little bit of the cool blue in the shadows, especially near the tail.
Next, we’ll continue the background when everything is dry.
Finishing the Background
As before, we will first cover the background with water for an out-of-focus effect, but this time, we’ll use less water so the paint does not spread as much.
In the pink areas, we can drop in paint like we did before, and use a paper towel when the paint is almost dry to reveal patches of white. We can also drop water onto a few areas while the paint is still slightly wet to create blooms – unexpected paint formations.
For the grassy green area, we’ll paint with strokes that flow with the direction of the grass, using different shades of green by varying the yellow to blue ratio.
This layer will dry quicker, since we used less water, and we can then add finishing touches to the background.
Using dry brushing (painting with very little paint on the brush) we can add texture to the grass. Holding the paint brush mostly sideways and quickly pulling it along the paper in the direction of the grass produces strokes that leave paint on the ridges of the paper (this is one advantage of using cold press paper).
For the flowers that the hummingbird is at, we’ll add a little detail, but not so much that it will distract from the focus on the hummingbird.
We start with a water glaze, then simply paint in the darker areas with warm yellow. The stems are just a stroke of light green with a thin brush, and a stroke of darker green on one side with the tip of that brush.
Painting the Wing Feathers
The hummingbird wing feathers are intricate and semi-transparent, so we’ll spend a while painting them to achieve such an effect. After a base layer, we will use the edge softening technique to create the shadows while using just a thin layer of paint that will let the background colors show through slightly.
First, we mix the brown color of the wings. I find it easiest to start by mixing purple with blue and red, then add a little yellow until it is brown.
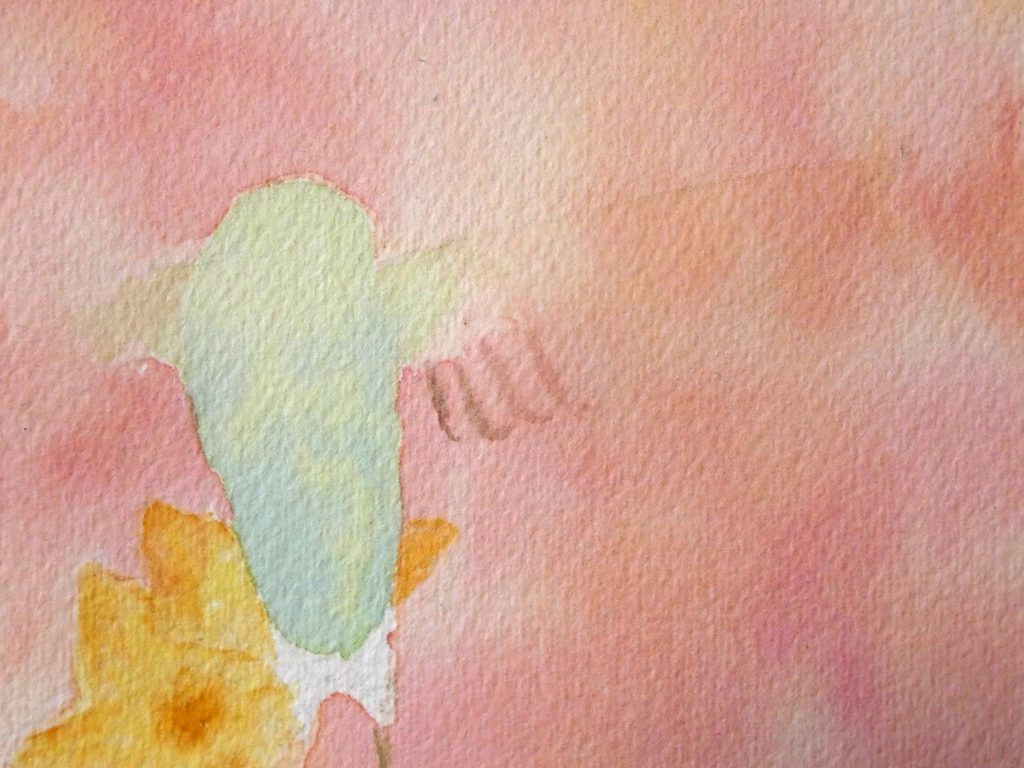
Next, we paint a water glaze over the wing shape and when it is damp, we paint the left side outline of each feather using a thin-tipped brush. The picture shows this for the first few feathers.

And do that for the entire wing. We also paint the top outline of the uppermost feather.
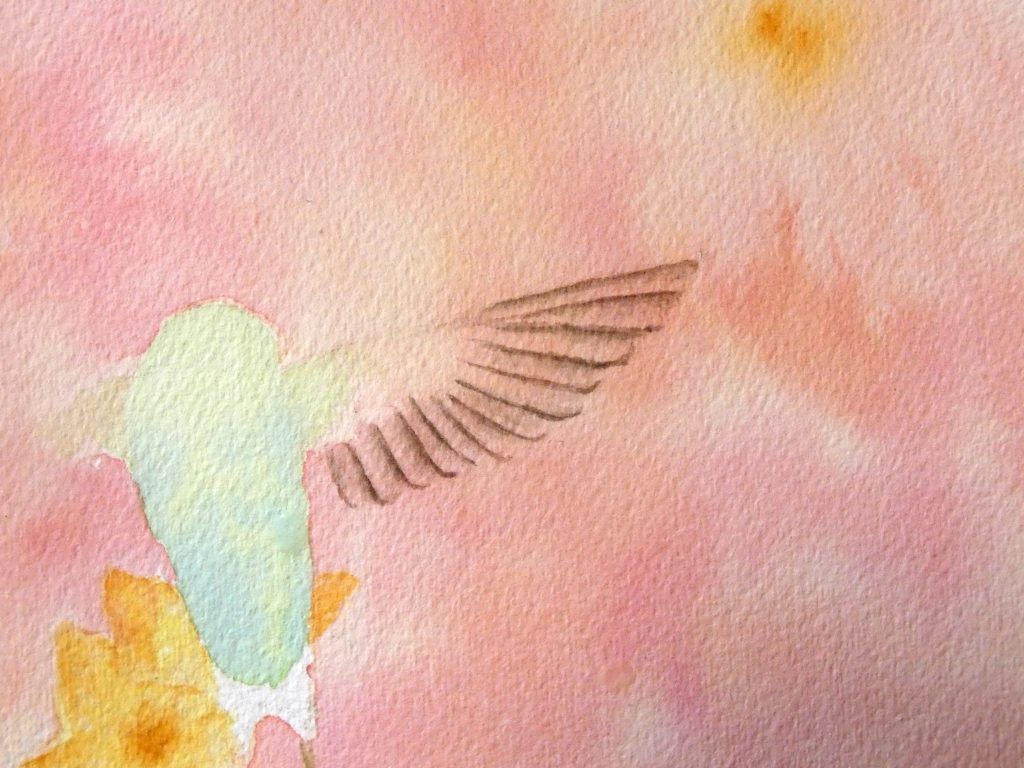
Then we repeatedly paint the shadowed edge, and use a separate, damp brush to soften the paint outward onto the lower feather.

We do the same technique for the smaller feathers on the wing close to where it attaches to the body, and then repeat the same process on the other wing.
Painting the Hummingbird Body

We’ll paint the next layer of the hummingbird body on dry paper, but with a lot of paint on the brush. Starting with cool yellow, we cover most of the hummingbird, leaving random patches unpainted, where the base layer will show through. While the yellow is still wet, we’ll drop in vibrant greens and blues into the shadow areas, letting those colors spread and blend with the yellow. I added Mayan Blue Genuine in a few places for the extra texture that it dries with.
When that dries, we can begin forming feathers.

With a high concentration of paint (a blue green) on the brush, we can make small dashes to give the impression of feathers. The tail and upper wing feathers are longer, so we use longer strokes for them. For the areas in shadow, we can make a darker color by either adding additional blue or adding a drop of red to the blue green.

Finally, we darken the shadows with another similar layer, and define the head with a bit of paint between it and the back. With that, our colorful painting of a hummingbird is completed.

I tried something different in this tutorial: images are followed by the text that describes them rather than the other way around. If you prefer one format or the other, let me know in the comments so I can improve this site.
Hello, Neat post. There is an issue with your site in internet explorer, could check thisK IE nonetheless is the market leader and a big part of other folks will miss your excellent writing because of this problem.